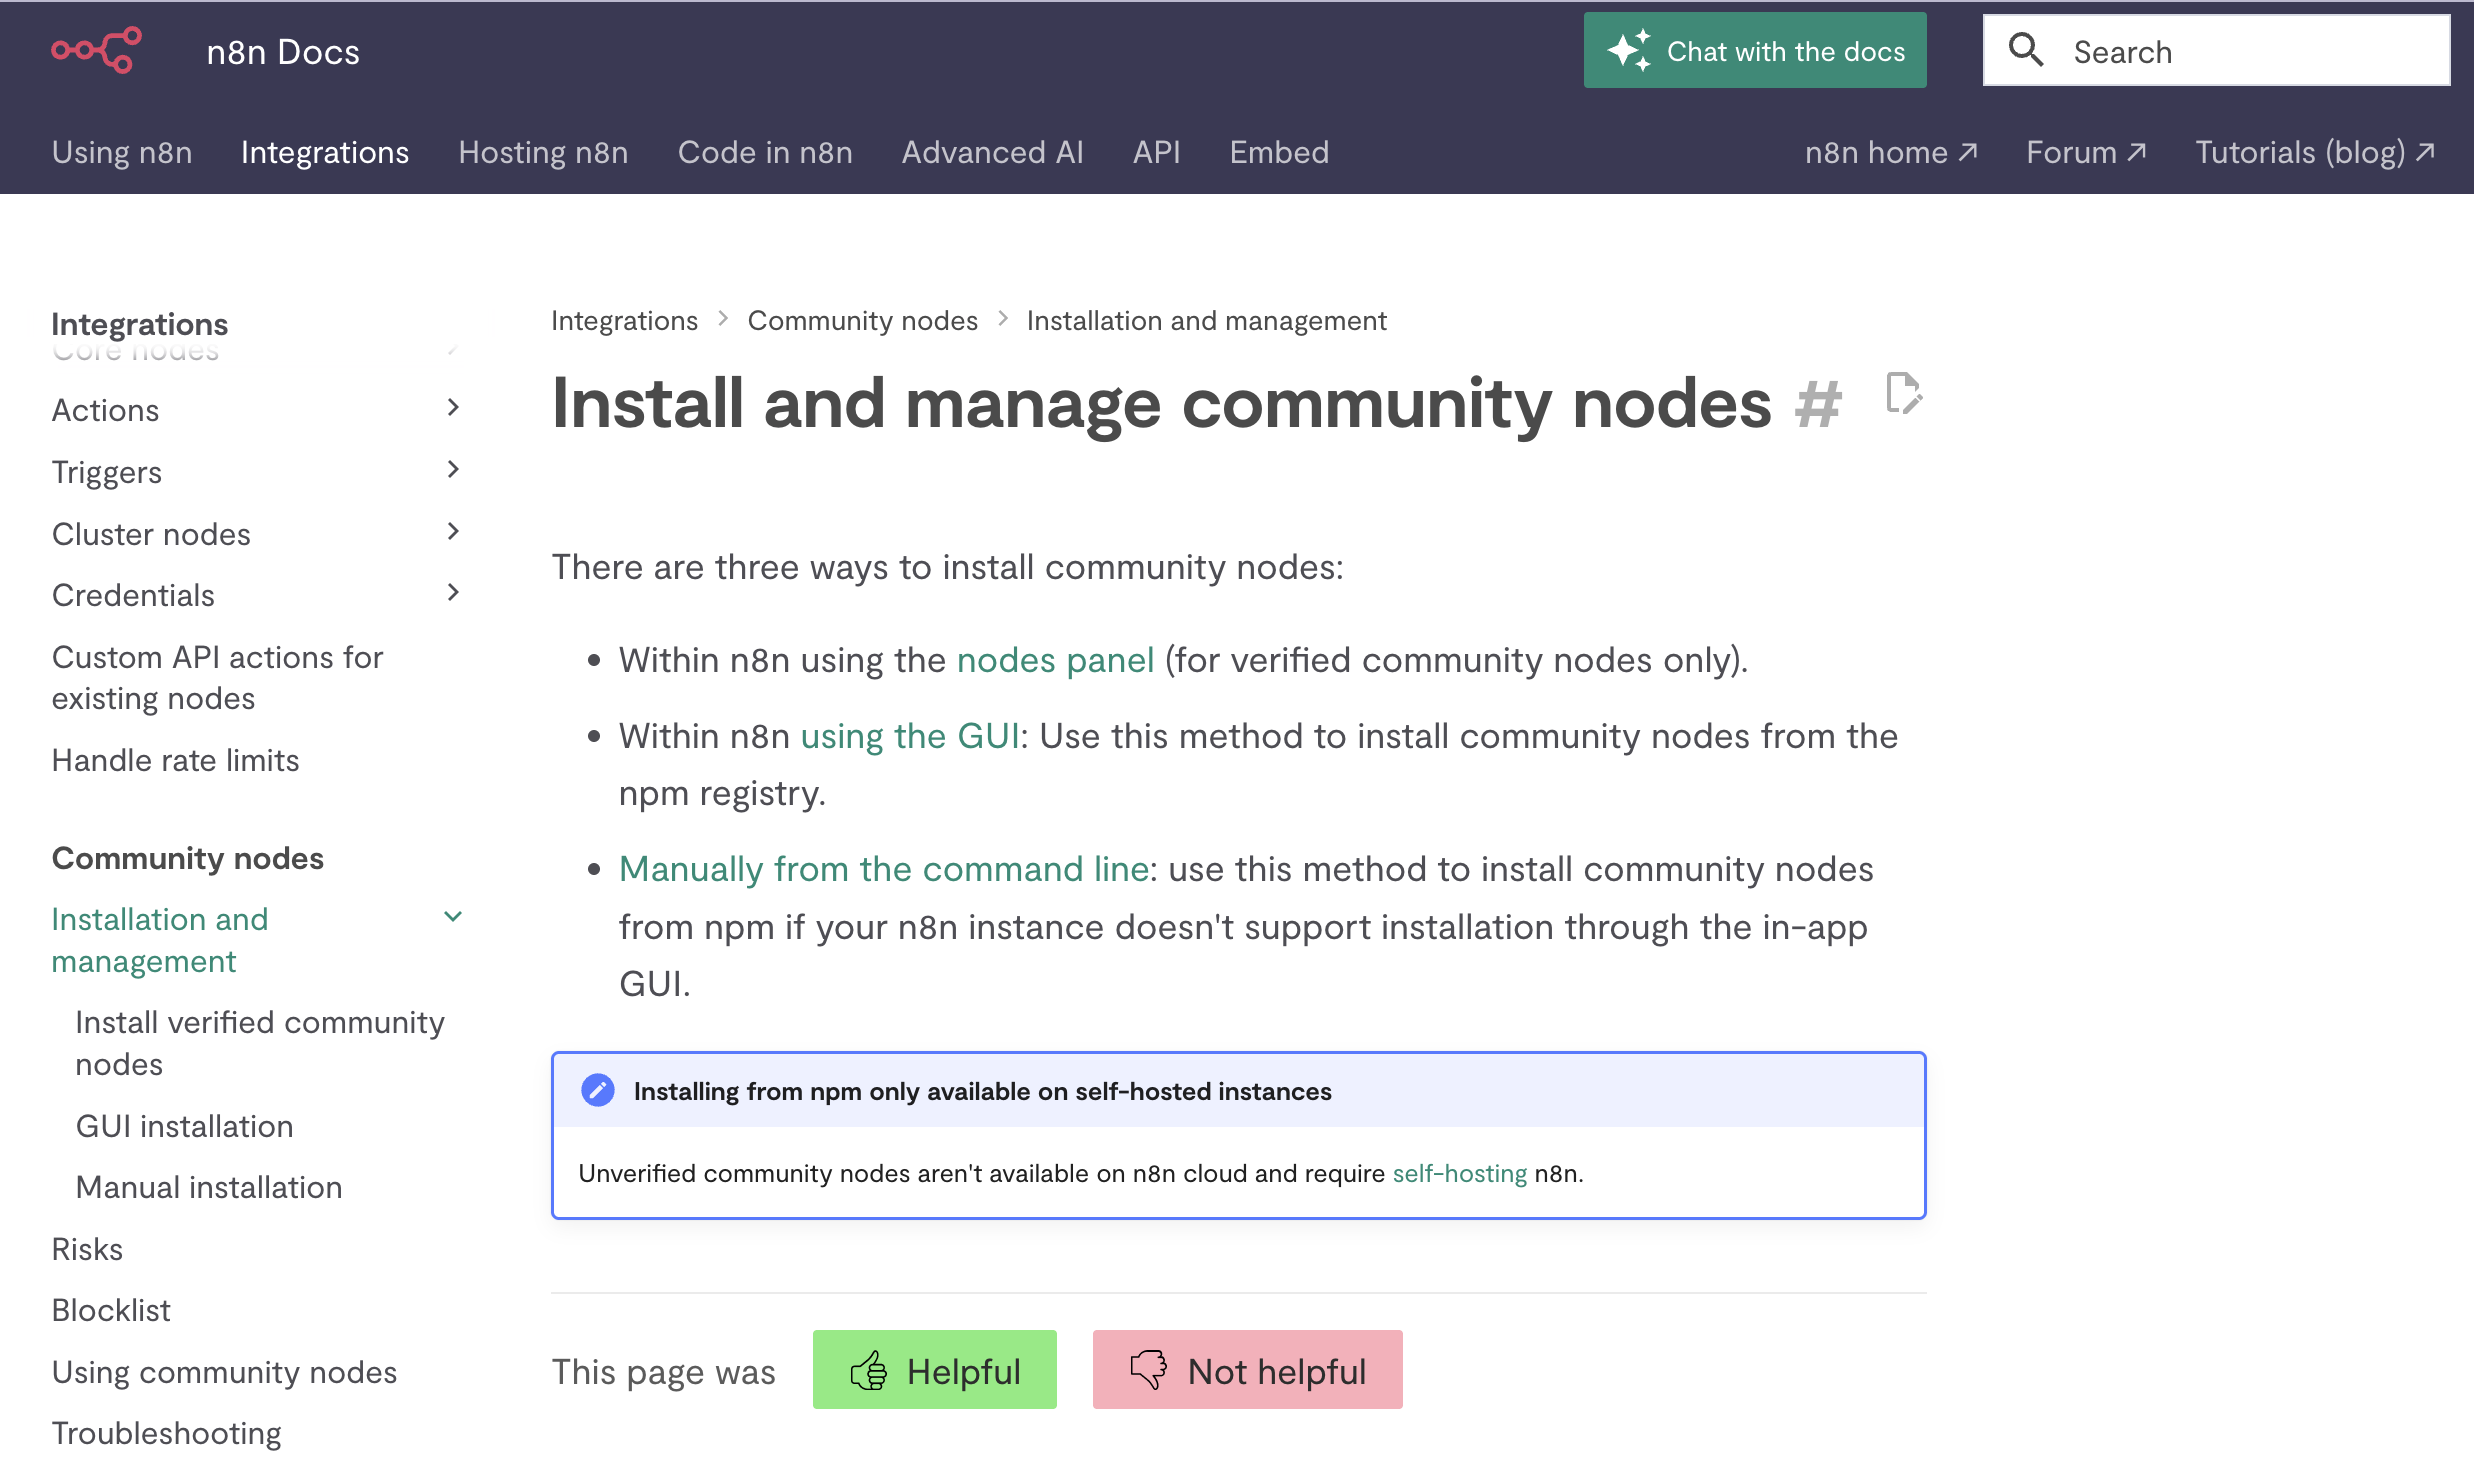
Firstly, if you find it troublesome to build your own system, you can easily use the official solution .Just Click here
- Official Documentation · Installation and Management of Community Nodes — Covers GUI/Command Line Installation, Verification of Nodes, and Common Issues.

NPM platform search
- npm keyword index (n8n-community-node-package) — Community nodes are uniformly published using this keyword; filtering by download volume and update time facilitates the assessment of activity level.

GitHub resources
- Awesome n8n · Top 100 — A curated list based on multiple indicators, grouped by scenarios (communication, AI, scraping, etc.), for quickly locating high-quality nodes.
Xiangyu suggests that you prioritize using the official Integrations directory and Awesome n8n list. These two resource libraries have been carefully curated, with high-quality nodes and timely updates. For specific needs, you can combine searches across multiple platforms for comparison.
Special reminder: solve the problem of missing connection lines during workflow import
During the actual use of Xiangyu, it was discovered that many users encounter a common issue when importing workflows that utilize community nodes: there are no connecting lines between the nodes in the workflow, giving the appearance of a “disconnected” state.
Root cause of the issue: The emergence of this problem is due to the use of specific community nodes during workflow creation, whereas in the user environment where the workflow is imported, these community nodes have not been installed. n8n cannot recognize the missing node types, resulting in the loss of connection relationships between nodes.
Solution:
- Install the community node first, then import the workflow — this is the most effective preventive measure
- Follow this tutorial to install step by step — use the installation method below to ensure all dependent nodes are installed correctly
Important reminder: This is also the main reason why Xiangyu updated this detailed tutorial today. I hope it can help everyone thoroughly solve this problem and make the sharing and use of workflows smoother.
Precautions
Before using community nodes, Xiangyu must remind everyone of several important security and privacy considerations: security assessment
Community nodes are created by independent developers, and although most of them are well-intentioned contributions, their code quality and security may vary. Before installing, it is recommended to:
- Prioritize officially certified nodes: n8n officially certifies some high-quality community nodes, which have undergone stricter scrutiny in terms of security and stability
- Check the GitHub repository of the node: inspect metrics such as code update frequency, number of stars, and issue handling status
- Reading user feedback: Viewing other users’ experience on community forums or GitHub Issues. Key and credential protection
Community nodes typically require you to provide API keys or login credentials for third-party services. To protect the security of your account:
- Use dedicated API keys: Create separate API keys for n8n to avoid using the main account key
- Set appropriate permission scopes: only grant the minimum permissions required for nodes to complete specific tasks
- Regularly rotate keys: Regularly update API keys, especially after discontinuing the use of a certain node
- Avoid using sensitive credentials in a shared environment: If your n8n instance is shared among multiple users, please handle workflows containing sensitive information with caution
Remember, exercising caution with community nodes does not mean rejecting innovation; rather, it means maintaining necessary security awareness while enjoying the convenience contributed by the community.
- One-click installation: Find the n8n-nodes-serpapi community node (usually marked with “Community” or displaying an installation icon), and click the Install button on the node card.
- After the installation is completed and successful, the node will be automatically added to the current n8n without any additional operation. You can add the node and bind your credentials according to your needs.
Method 2: Managing installation in the settings panel (traditional method)
This method is applicable to all community nodes, including those that have not yet obtained official certification.

Important reminder: Please ensure that the package name entered is completely accurate, as it is case-sensitive.
[Image placeholder: screenshot of the Install Nodes dialog box, with the input box filled in with “n8n-nodes-serpapi” and the “Install” button highlighted]
- After clicking “Install” to proceed with the installation, n8n will automatically download and install the node from the NPM public registry. This process is fully automated, requiring no command-line operations.
- After a brief moment of installation confirmation, the system will display a success prompt “Node installed successfully”, indicating that the node has been successfully installed.
Comparison of two methods
Comparison between workflow page installation and settings panel installation:
Scope of application: Workflow page installation only supports officially certified community nodes, while settings panel installation can support all community nodes, including uncertified nodes.
Operational convenience: The installation of workflow pages is more convenient, as users can directly search within the workflow and install with one click; the installation of settings panels requires multiple steps, including entering the settings page, entering the package name, and other operations.
Recommendation level: For officially certified community nodes, workflow page installation is the preferred method; for unverified or newer nodes, settings panel installation is a necessary backup method.
Xiangyu’s suggestion: If you are installing an officially certified community node, give priority to Method One; if it is a newer or uncertified node, use Method Two.
Step 3: Verify the installation effect of the node
Regardless of the installation method used, we need to verify whether the node is installed correctly.
If you use Method 1 for installation: The node has been automatically added to the workflow and can be directly configured.
If you choose to install using Method 2: You need to manually add a node in the workflow. Click the + sign in the top right corner and enter “SerpApi” in the search box. You will find that the SerpApi node has already appeared in the selection list.